Information Design Design - Final Project: Animated Infographic
4.3.2024 - 22.3.2024 (Week 4 - Week 7)
Vanessa Kei Kurniadi / 0360525
Bachelor
of Design (Hons) in Creative Media
Information Design - Final Project:
Animated Infographic

INSTRUCTION
In this task, we are tasked to make an animated infographic. We are allowed
to choose between these 4 topics:
- The History of Video Game
- The Journey of a Product from Factory to Consumer
- The Impact of Social Media on Society
- The Journey of a Plastic Bottle

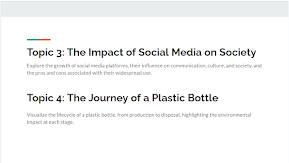
fig 1.1 Topic options and their brief explanation
We discussed about what topic would be good for our final project. And
after much consideration we decided to work on Topic #3
Then we had to choose a more specific theme within the topic. So on our
WhatsApp group we made a vote.

fig 1.2 Voting for our project theme
Task Delegation
Here is our task delegation:
- Research on Topic: Joey and Wan Qing
- Script: Han and Joey
- Storyboard: Wan Qing
- Animatic: Wan Qing, Han, and Joey
- Assets: Adriena and Vanessa; Background: Joey
- Animation: Han and Wan Qing
- Background Music + SFX: Joey
- Voice Over: Adriena
fig 1.3 task delegation
First off, Joey and Wan Qing worked together to do some research on
cyberbullying and its relation to social media.
fig 1.4 data research result by Joey and Wan Qing
Storyline
We then tried to make a short storyline to serve as the animated infographic.
This is how the storyline goes:
The story begins with a girl taking a selfie to share on
social media. Pleased with the photo, she uploads it to her preferred
platform. However, her joy is short-lived as she receives hurtful comments
about her appearance. Obsessively, she repeatedly checks for new comments,
even during breaks and before going to bed. These comments weigh heavily on
her mind as she takes them personally, reflected in her changed behaviour of
dressing in loose clothing to hide herself.
One day, she discovers a post mentioning her with more
negative comments attached. This exacerbates her inner turmoil, leading to
sleepless nights filled with tears and despair. In an attempt to find
solace, she decides to disconnect from the online world entirely. With time
and self-reflection, she begins to heal. Upon returning to the internet, she
encounters the same hurtful comments, but now they no longer have power over
her. Confident in herself, she realizes that others' opinions hold no sway
over her, embracing her identity as a strong, resilient individual.
Script
From the gathered data and storyline we then made a script to as a guide for
each scene, as well as dividing the story into phases.
fig 1.5 our initial animated video script and visual suggestions
We then recorded the voice over from the script to help time the video, but
then realized that the voice over was more than 4 minutes, which far exceeds
the video time limit which is 3 minutes. So we did a revision and shortened
our script.
fig 1.6 our revised script and visual suggestions
To help access all the documents easier and to help with the work flow, we
then compiled all the existing material into slides.
fig 1.7 slides with our current documents
Color Palette
We did some research on the color palettes that we wanna use, and apparently
infographic posters on cyber bullying uses a lot of blue and orange. We also
think it would be a nice idea since blue and orange are quite a contrasting
color.
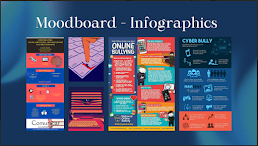

fig 1.8 moodboard and color palette
Upon further research we also learned that the chosen colors have their own
little meaning on the topic.
Blue signifies trust, reliability,
and responsibility. It elicits important emotions like calmness, peace,
stability, and harmony. It’s one of the most liked colours, and is seen on a
lot of websites and social networks like Facebook, Twitter, LinkedIn
Orange is also used to promote
anti-bullying. It is a tangible representation of the supportive, universal
message that our society wants to prevent bullying, and is united for
kindness, acceptance, and inclusion.
Choosing Font
We did some experiment to see which font works best, and here's what we chose:
- Main heading: Berlin Sans FB Demi (Bold)
- Subheading: Arial (Bold)
- Newspaper: Times New Roman (Bold, Normal)
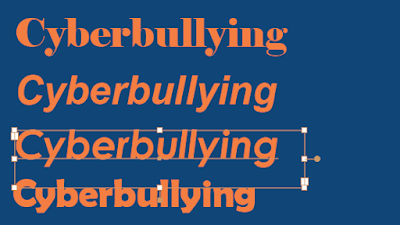
fig 1.9 font experiment
Storyboard
Wan Qing had sketched out the storyboard based on the script
information and visual suggestions. Initially, the storyboard focused
heavily on the animation with a storyline. However, Mr. Shamsul
encouraged us to include more statistics such as graphs or charts to
convey the data more effectively.

fig 1.10 storyboard by Wan Qing
Animatics
We were tasked to create an animatic, which is a string of
storyboard sketches edited together with sound to illustrate how a
sequence will flow in motion.
Wan Qing and Han drew and animated the sketches for each scene. I
combined both their parts together with the voice-over from Adriena
and added some background music.
Mr. Shamsul suggested we make some changes and add more assets.
After that, we can start animating our assets.
fig 2.1 our cyberbullying animatic
While the animatic was being developed, Adriena and me started making the
characters, props, backgrounds and other necessary assets based on the
storyboard and script. This was all done using Adobe Illustrator and Adobe
Photoshop.
Character Design
Adriena is in charge of making all the characters to make them all
consistent. In class she has made a character design on how the female
character will look like along with all of her expressions.

fig 2.2 character design


fig 2.3 making the main character on illustrator
For the clothing we decided to give her a simple collared dress. We
initially planned to give her a red dress, but since it clashed with
her hair color we tried experimenting with some color until we decided
that dark forest green works perfectly.


fig 2.4 making the dress


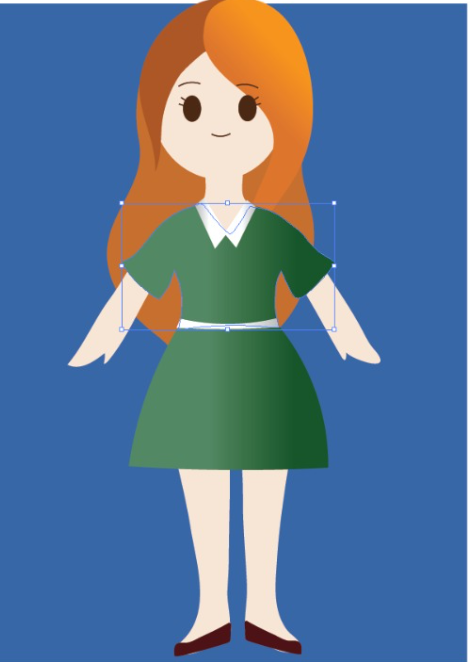
fig 2.5 dress color experiment: red, teal, and green

fig 2.6 loose dress for main character
We also made some different poses of the main character for the video content, such as meditating and exercise.


fig 2.7 main character other poses
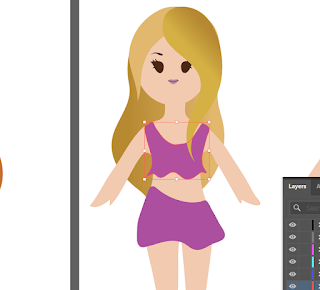
fig 2.8 Influencer character design
We also made the side characters to aid the story, which is the main
character's parents, counselor, and extra figures.


fig 2.9 making the side characters and extra figures
Other Assets


fig 3.1 phones


fig 3.2 instagram posts using mockups and applying filters in
photoshop

fig 3.3 placing posts in a phone


fig 3.4 hate comments and speech bubbles


fig 3.5 Instagram assets


fig 3.6 other assets


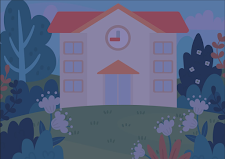


fig 3.7 backgrounds asset
Animating
Once the assets are done, they are put into the google drive
for the animators to use. The Google drive itself contains
our assets, voice overs, backgrounds, sound effects, and
other things that is needed for the animating work.

fig 4.1 Our google drive
Han and Wan Qing organize the assets into individual layers so they could be animated individually.
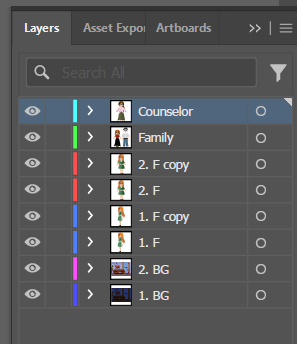
fig 4.2 organizing the assets into separate layers
When the assets are organized, they started to create the scenes into artboards according to the script guide.


fig 4.3 creating the scenes
When the scenes and assets are ready, finally Han and Wan
Qing started to animate them in After effects.


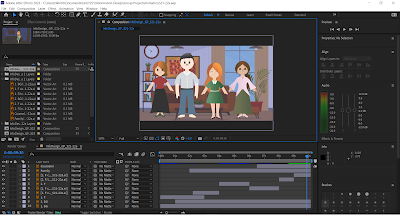
fig 4.4 animation progress
The scenes are done in 2 parts (probably to ensure
it can be exported without crashing and to animate
them easier with less layers piling up) and will be
merged in Premiere Pro afterwards along with adding
sound effects.
Here are the parts before they are merged into full
animation (there are some extra parts added while
the clips were edited in Premiere Pro, but these are
the main ones):
fig 4.5 Animation part 1
fig 4.6 Animation part 2
After the animation are done, they are put into
Premiere pro. This part was helped by Joey. She also
reversed and sped up the first part as a rewind
scene for the full video.
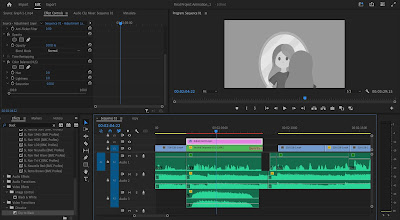
fig 4.7 making the rewind scene
She then edited the blue background for the title
slide and some scenes. Apparently the earlier
title slides has a more pale blue shade than the
later parts.


fig 4.8 changing the background shade
She also added the rolling credits in the end.

fig 4.9 rolling credits
Sound Effects
We used Adriena's voice as the voice over for
the video. The voice overs are already added
during making the animations to help with the
duration and to sync the parts with the
narrative. This makes the work very easy for
Joey. But to make sure the audio is consistent
throughout the video, she removed the audio from
the animation and put a full audio from the
original recording.
fig 5.1 Voice over by Adriena
She said the original voice over still had some
background noise/static, so she used noise
suppression

fig 5.2 reducing background noise
Joey is also in charge of giving the video
some sound effects. All the sounds were
gathered from
https://pixabay.com/
and
https://freesound.org/. For sounds she couldn't find she just used
similar sounds and use Premiere Pro to modify
it a bit according to what she needs.
She either used audio that has repeating
sounds or repeat the same cut of sound effects
multiple times whenever needed. She also gave
some crying sound effects and other sounds to
make sure the audience gets the atmosphere of
the scene.


fig 5.3 adding sound effects
Joey also gave the video a background
music to fill the silence without
overpowering the voice over. She wanted to
use a music that is a bit mellow yet
lively. She then decided to use "Last Day of Summer by last drm" as the background music. She also gave
a fade in and fade out transition at the
start and end of the music.


fig 5.4 adding the background music
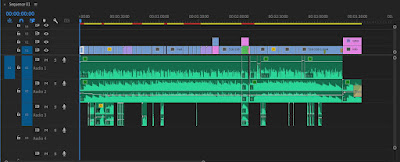
fig 5.4 Premiere pro full timeline
Here is the result:
fig 5.5 Animation result 1
After it is done, in the next class we
showed it to Mr. Shamsul. He then gave us
some feedback on what we could change in the
infographic to better display the
information into the audience. So we made
some revision following his feedbacks.

fig 5.6 counselor sitting instead of
standing


fig 5.7 phone display revision


fig 5.8 graph display revision

fig 5.9 Revised video timeline on
Premiere Pro
Final Result
fig 5.10 Final Animated Infographic


Comments
Post a Comment