Video and Sound Production - Exercises & Project 2
13.5.2024 - 10.6.2024 (Week 5 - Week 8)
Vanessa Kei Kurniadi / 0360525
Bachelor
of Design (Hons) in Creative Media
Video and Sound Production - Exercises
& Project 2

INSTRUCTION
EXERCISE
On our 3rd exercise we were instructed to practice doing color grading with
the clips provided by Mr Martin.

fig 1.1 Importing all the needed clip into Premiere Pro, week 8
(13.6.2024)
I dragged the clips to the timeline with the order that I think is correct:
girl knocked her bottle, she wakes up a while later, checked on her phone
which wasn't plugged to electricity and was irritated.

fig 1.2 Arranging the clips, week 8 (13.6.2024)
Next, I cut off the part that was part of the shooting session, but not
meant to be on the actual scene.

fig 1.3 Trimming the clips, week 8 (13.6.2024)
On the first scene, the initial color was a bit greenish and cold. I'm
not sure on the context of the story, but I feel like this scene deserve
a bit warmer coloring. The scene was also already very bright, so I just
lighten it up just a tiny bit to make it even better.
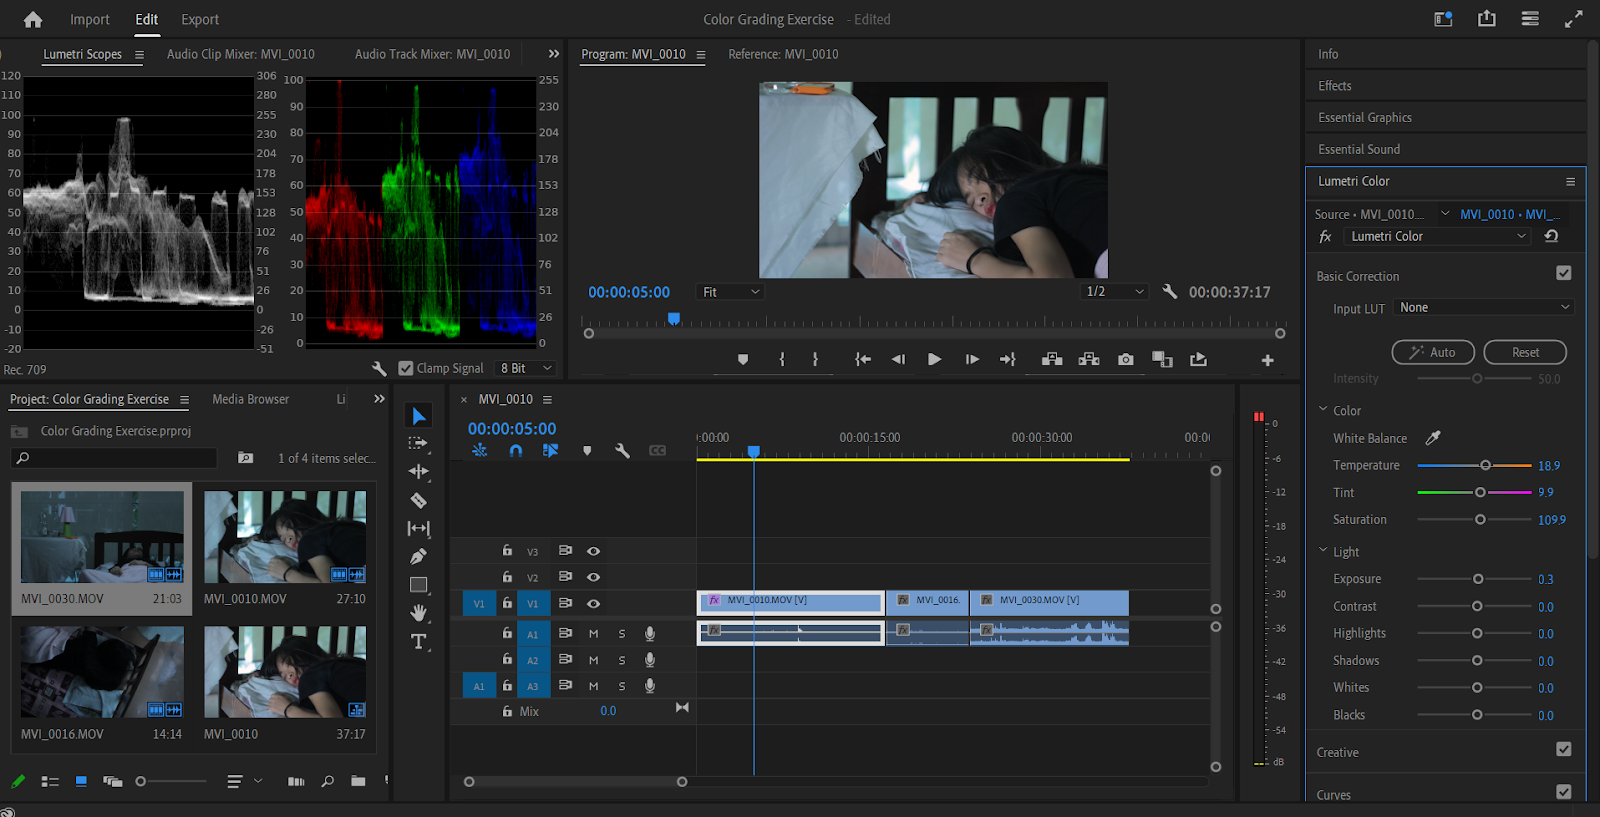
fig 1.4 Color grading first clip, week 8 (13.6.2024)
Next I adjusted the color of the second scene. The second scene is
originally VERY dark compared to the first scene, so I did a lot of
exposure on it. I also adjusted the temperature a little bit to make it
slightly warmer looking. Now the lumetri scopes of both scenes are
similar, and the second scene doesn't look like it came out of a horror
story anymore.

fig 1.5 Color grading 2nd clip, week 8 (13.6.2024)
For some reason, this specific scene is very loud with white noises. So I
had to use the denoise effect on the sound effects, and put the denoising
effect to 60%. Now, this also makes the noise a slightly bit louder (or
maybe that's the effect after the white noise is filtered). So I went to
effect controls and put the audio bypass by -9 (it's quite a lot, but I
measured the volume by listening to her sighs sound from the second clip).
Now the scene feels more natural and less annoying to listen to.


fig 1.6 Color grading 3rd clip, week 8 (13.6.2024)
Lastly, I watched the clips one last time to see if they're all good, and
when I'm finally satisfied, I exported them and put them on my drive.
Final Look
fig 1.7 Color grading exercise final result, week 8 (14.6.2024)
Quiz:
Attempt 1: 4/5
Attempt 2: 5/5

fig 1.8 Quiz result, week 8 (13.6.2024)
Project 2A: Shooting Exercise
In this project, we were divided in 3 groups to recreate some scenes from
"Everything, Everywhere, All at Once".
Here are the scenes that we need to remake in our shooting session:
fig 2.1 List of scenes we need to remake
Here are our shooting schedule for the day:

fig 2.2 Our shooting schedule, week 6 (27.6.2024)
We then gather together on Monday to do our shooting session.


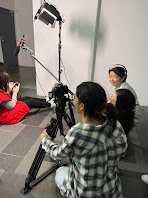
fig 2.3 Our shooting session, week 6 (27.6.2024)
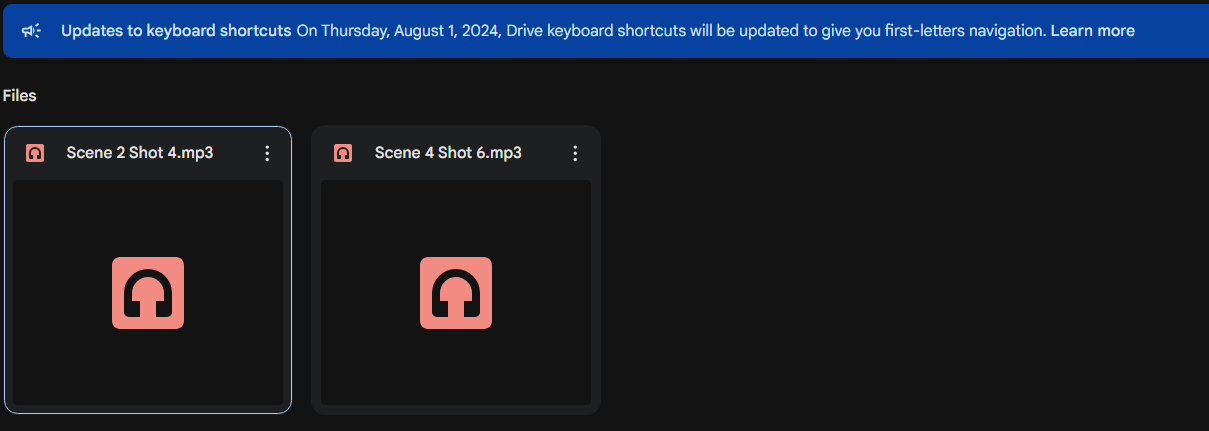
When the shooting session is done, my teammates helped to compile all
the video and audio footages from the shooting to Google Drive for us to
access.


fig 2.4 Drive for all the needed things for the shooting session,
week 6 (29.5.2024)
One of my teammates also helped to list the potential footages that
she thinks will be suitable for the next task.

fig 2.5 List of potential footages made by one of my teammates,
week 6 (29.5.2024)
The next thing I did is to download the footages needed for the
post-production. to save time, I just followed the recommendation
from the potential footages list made by my friend. For the ones
that has 2 options, I checked the video footages, and then decide
which one I wanted to use for the editing process.
After the videos are chosen, I only needed to match the scene, shot,
and takes of the video with the one on the audios.
We also have the voice over of the actors made separately, due to
the fact that the boom mic has trouble catching their voices when
they were shooting outside. Not only there were a lot of people
passing by and talking, it was very noisy because of the heavy rain
(maybe even a storm) that day.


I imported the video and audio footages into Premiere pro and then
try to synchronize it, but t always fails, so I decided to
synchronize each audios manually by hand. It wasn't until I reached
the final clip, that I realized I need to unlink the audio by right
clicking the video and original audio first before it can be
synchronized.


fig 2.7 original audio needs to be unlinked from the video
first to be synchronized, week 7 (7.6.2024)
Now that the audios has been synchronized, I then proceeded to cut
the beginning and the end of the video so only the wanted scene is
extracted.
Mr Martin instructed us to not follow the original order of the
movie and to use our creativity to make our own sequence. So I did
some brainstorming to think on how I should proceed with the clips I
have at the moment, and here's what I ended up with:

fig 2.8 Story planning for the scenes, week 7 (8.6.2024)
Since I already have an idea on how I should proceed with this, I
started to cut the clips here and there, rearranged them to what I
think would fit the scene best. Since this scene also includes a lot
of flashbacks, I used the "dip to white" video transition as a
flashback effect.
This is also an additional thing I added, but I added a slow step
sound effect to the girl's walking scene to emphasize her walking
away at that time, which leads to her death.

fig 2.9 adding slow steps sound effect for the girl's walking
scene (8.6.2024)
Color Grading
I also applied some color grading into the clips. For the "present",
I applied stronger color, but made sure not to use too much orange.
I learnt that orange is supposed to be used for happy and warm
scenes. On the contrary, I made the scene to be tense fighting
scene, so I applied a lot of green and blue into the scene.
For the flashback, I used a more desaturated scene, to signal that
they are past memories. But there's a touch I added into it. I made
it seem as if the closer the scene is to the point where the girl is
critically injured more desaturated than before, and when the girl
is at the point of dying, the color is completely lost, but the
contrast is strong. The reason for this is because I want it to seem
as if in the eye of the guy, the girl give the color for his world.
When the girl is nearing the time that she got injured, the color is
slowly fading, and is lost completely when she's dying. The contrast
also means that the scene is etched so strongly and clearly on his
mind, like a trauma.


fig 2.10 Color grading the clips, week 7 (9.6.2024)
Adding Titles
I also added some text/titles on the clips. I want to give more
context on what is happening to the audience. I feel like the
scene is very minimum, so the audience might need to guess
roughly on what is going on.
These texts are meant to give some context on what the short
scenes are telling them, while keeping it a little open for the
audience to use their own imagination on what's happening and
what happened in the end. I figured that this method might be
perfect for a short movie like this, especially when I don't
have enough clips to explain the exact context.

fig 2.11 Adding titles and texts, week 7 (9.6.2024)

fig 2.12 Adding music and end credits, week 7 (9.6.2024)
After double checking the end result, I exported the movie into
YouTube, and named the clip "A Regret's Promise" (cliche, I know,
but bear with me lol).
Final Result
fig 2.13 A Regret's Promise, week 7 (9.6.2024)
Project 2B: TikTok/Insta Video
In this project we are tasked to create a TikTok/Instagram video. It can be anything that we like or taken interest in, and we are allowed to take inspiration from other videos. But there is an important note, that we are not allowed to take the concept as is. We need to add our own creativity and personal touch to it, otherwise we'll lose a lot of mark for the project.
For this task, I am planning to create a creative journaling video.

fig 3.1 Creative Journaling
Creative journaling video is one of my favorite things to watch because not only it is interesting to see the composition come into place creating a beautiful and unique composition, it also has that soothing ASMR sounds in the process. Not to mention, even the process itself is very relaxing and soothing to the stressful mind.
Now that the initial concept is there, I need to put my own personal touch into it. And my idea is this:
As far as I know, Journaling video usually uses a static camera, that almost never change in angle nor position throughout the whole process. So for that matter, I want to add more varieties in the shots for the process. Maybe a bit cinematic in that sense.
First off, I tried to create as accurate a story board as I could. The reason for me saying this, is because the Journaling process is pretty much a spontaneous, in-the-moment type of creative works. You don't really think much on what you're trying to do or what the finish look is going to be like.
From my past experience, I can visualize a whole cool look of what I wanna make, only to either not have the resources (stickers, tapes, etc) for it, or that I just get lost in my own thought and created a very different, yet still satisfying result.
So with that in mind, here is my storyboard for the video:
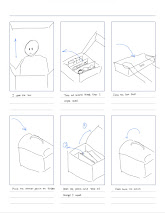
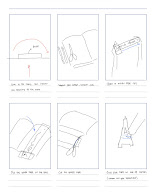
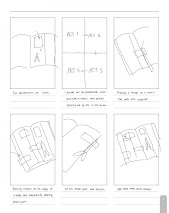
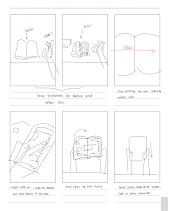
fig 3.2 My insta/tiktok video storyboard, week 9 (17.6.2024)
After the storyboard and proposal is done and submitted, the next week I started to work on the actual making of the video.
It felt a bit weird having to do the journaling beside a recording camera. I am much more careful and conscious in my movement and positioning to avoid blocking or even unintentionally moving the camera. I also gotta make sure that the camera is capturing what I'm doing properly, though in the results afterwards, some of the shots are almost offscreen, but there is nothing I can do anymore for that.
Also, you might've noticed that there is a really long time gap between the first recording and the second. And that is because I got caught up in other assignments and had to go back to the recording last minute. :') (It was a hectic semester for me, so please forgive the awful time management)
I did the shots one step at a time, because not only it is easier for me to find the part that I need for the editing phase, I also have more freedom in redoing the shots that I need to redo.


After a long process, I finally got all the clip, so I proceeded to edit them in Capcut with the best of my ability (this is like, my 2nd time using it in my life hahah).
For the song, I just used the song called "Children, Parents and Children beautiful and bright songs By Oharu" (not sure why the extremely indirect long name but that was the name stated in the Capcut and TikTok). The song is a chill but bright and happy themed one, which I think is suitable for the content of the video.
What I initially wanted to do was to just cut the part where I just played and about to end the recording. But even not halfway of the video, I realized that the video is already far too long than the duration that it was supposed to be.
So I decided to cut the clips until it only shows a specific action that I wanna show. Either it's the cutting, the sticker applying, or even the rubbing the sticker. Unexpectedly, it bring out a nice touch to the video. This method makes the video very straightforward and thus keeps it interesting.

fig 3.4 Editing the clips in Cap Cut, week 11 (30.6.2024)
At the start and the end of the video, I used the "fade in" and "fade out" effect to create a smooth transition for start and end of the video. Though for some reason the transition has some kind of blurry effect in them. I tried to look for another similar transition without the blur effect but I couldn't find it. So I just stick with what I have.
Final Result
Tiktok video: https://vt.tiktok.com/ZSYKJfytd/
FEEDBACK
Week 6
- A dialogue will have a reading around -12 on the audio recorder
- Ambience sounds will have a reading of about -18 on the audio recorder
- No need to worry if you make small lighting mistakes or a bit of a shakey shot, because you can fix it in post-production
Week 7
- No class (Public Holiday)
- Learn about color grading and edit the footages from the shooting session
Week 8
- No class (Independent Learning Week
REFLECTION
Experience
The shooting session I did in the beginning of this project was so
much fun. It was quite tiring, especially since as the sound
director, I had to listen to loud sounds during most of the session.
But the end result was worth it and it was a very valuable
experience for me.
I also had some fun experimenting with the color grading. Mr Martin
wanted us to use various color grading for the clips, so I had to
challenge myself and try to use the right color for each scenes
while trying to apply different coloring for different scenes.
For the blog making, when I was almost finished with the
documentation, the blog suddenly decided to delete everything, so I
had to redo everything from square one, which almost made me flip.
But thankfully, even though some screenshots of the progress was
lost, I managed to work around it and give a decent progress
documentation.
Observation
I noticed how serious and determined my friends were to create good
shots to remake the scenes from the movie, and I admire them for it.
They put in so much effort into the shoot that I kind of feel like I
didn't do much.
Findings
From the shooting session I managed to see how a movie production
work is like (or at least a lower budget one lol), and I had a
hands-on experience on using the sound tools and the boom mic.
From this project I found out how to play with the colors and
produce an even more dramatic outcome of the what seems like a basic
clip. I finally know how a simple change of color could affect the
whole atmosphere.


Comments
Post a Comment